Setting up a Kubernetes cluster (K3s) using Raspberry Pi's and Portainer
“If bridge building were like programming, halfway through we’d find out that the far bank was now 50 meters farther out, that it was actually mud rather than granite, and that rather than building a footbridge we were instead building a road bridge.”
- Sam Newman, Building Microservices
The way we build software is changing. Instead of following a rigid specification we now build applications in a much more agile way which means we need to apply this mindset into our infrastructure and deployment process. Because of this almost all of the applications I build are containerised and sometimes split into modular parts. I work on most of my projects on my own which means having the ability to throw applications onto a server quickly with minimal set up is a huge plus for me.
Hosting these containers is easily achieved on a single server instance as there isn't a large amount of configuration involved; you just install Docker, hook up Nginx to the containers with a reverse proxy and you're done. The problem with this though is that you're somewhat restricted in how easily you can manage these containers. For example, you may want to scale up based on demand or add more server resources quickly. If only there was a way to have your containers spread across multiple server instances...
Enter Kubernetes! an open-source platform for container management. I've been experimenting with this and a cluster of Raspberry Pi's for the past week and wanted to share what I've discovered thus far.
There's already a vast range of different products that offer what Kubernetes does. For example, you have AWS ECS which will almost guarantee you services never go down, but for some, the world of IaaS can be quite intimidating when you move past single instances in part due to the complexities of their pricing structure. When you're just getting started; having a couple of Raspberry Pi's doing the same thing is perfect, it's also great for a small hobby project or learning! You know what you've got and you'll never have any unexpected costs. If you've already got some of the equipment lying around then it may end up being way cheaper in the long run than IaaS services can offer.
At the end of this post, we'll have a Kubernetes cluster running vs-code across two Raspberry Pi nodes and we'll be able to view it all nicely through Portainer! The purpose of this post isn't to have a production-ready cluster running your high demand web applications but more as a gateway into Kubernetes clusters, and an excuse to use those raspberry pi's you've got kicking around!
Getting Started
Pre-Requisites
We'll need a couple of bits to get started, you can do this with just one Raspberry pi but if you want to distribute your applications across multiple nodes for resilience then you will, of course, need at least two Pi's to facilitate this.
Here's the whole shopping list:
- 2 x Raspberry Pi 4's
- 1 x TP-Link 5 port switch
- 3 x Short & Flat ethernet cables
- 1 x Modular Pi rack
- 2 x 32GB SD cards
The total of this should come to around £120. But of course, you can take out bits if you don't feel them necessary. I'd suggest getting the modular rack though.
I'd also recommend grabbing a main's powered USB hub as well to power the Pi's. It will cost less than buying each power supply for your cluster and will save you from having to search around the house for hours to find that one USB C cable you know you had somewhere (I wish I'd done this).
Now we have all the hardware we need, we can get on to setting up the cluster!
Building your cluster
Initial set-up
Once you've built your stack and hooked up all the Pi's we can chuck our OS onto them. You can use the Raspberry Pi Imager to install this, I'm using Ubuntu Server 20.10 (64-bit). The benefit of using the Raspberry Pi Imager is that the default installation has SSH enabled, so you don't need to mess around with plugging each pi into a monitor or messing around with system files.
Lets SSH onto our Pi's with the following:
$ ssh ubuntu@raspberry-pi-address

Once you're in you'll need to reset the password and then log back in.
First lets update our Pi's:
$ sudo apt update && sudo apt upgradeNext up we need to set the host names for each pi, we can do this using hostnamectl. Before we reboot again we'll do two things, change the hostnames and enable c-groups on the Pi's so the kubelet will work. You'll need to repeat this process across all your Pi's.
$ sudo hostnamectl set-hostname "pi-one"
$ sudo sed -i '1s/^/cgroup_enable=cpuset cgroup_memory=1 cgroup_enable=memory /' /boot/firmware/cmdline.txt
$ sudo rebootBecause we've now set up our hostnames we shouldn't need to use the IP address to ssh onto them, instead, we can refer to them with the hostnames we used:
$ ssh ubuntu@pi-xConfigure the master node
Okay, we've set up our hostnames and c-groups so we're all good to go with setting up K3s. Starting with our master node (pi-one in this case) we'll run the following to curl the installation script and execute it:
 $ curl -sfL https://get.k3s.io | sh -
 $ sudo k3s kubectl get node

Once this is complete we should be able to see that our cluster currently consists of one node which is, as expected, "pi-one". K3s also should have given you a token, we'll be using this token to connect our worker nodes to the master node. You can extract it with:
$ sudo cat /var/lib/rancher/k3s/server/node-tokenConfigure the worker nodes
The process for attaching our worker nodes differs slightly from the master node. All we need to do is run the installation script with a couple of environment variables set. These are K3S_URL & K3S_TOKEN which will be the token we just extracted. So from our other nodes, we'll run the following:
$ curl -sfL https://get.k3s.io | K3S_URL=https://pi-one:6443 K3S_TOKEN=token_from_earlier sh -It can take a couple of minutes to register the worker node but now if we hop back over to our master node we can run the 'get node' command again and (fingers crossed) we should see that our new node has joined the cluster.

If your node isn't connecting try running 'sudo service k3s-agent restart' to give it a kick.
Hooray! 🎉 we can see that the node has joined the cluster! Our cluster is now up and running, from here we could manually run containers on our cluster. However, adding containers manually can be a real pain. Really what we want to do is have a GUI to manage these containers adequately.
Setting up Portainer
We're going to use Portainer for this purpose, you may have read our previous post on setting this up to manage a local docker instance:
 Ed Leeman
For this guide, the installation will differ. Jump back onto your master node and run the following:
$ sudo kubectl apply -n portainer -f https://raw.githubusercontent.com/portainer/k8s/master/deploy/manifests/portainer/portainer.yamlNow we've added this the Portainer instance will be deployed into our local cluster in a few moments. Navigate to http://pi-one:30777 and we'll see the home page where we need to set a new password. Add this and hit next.
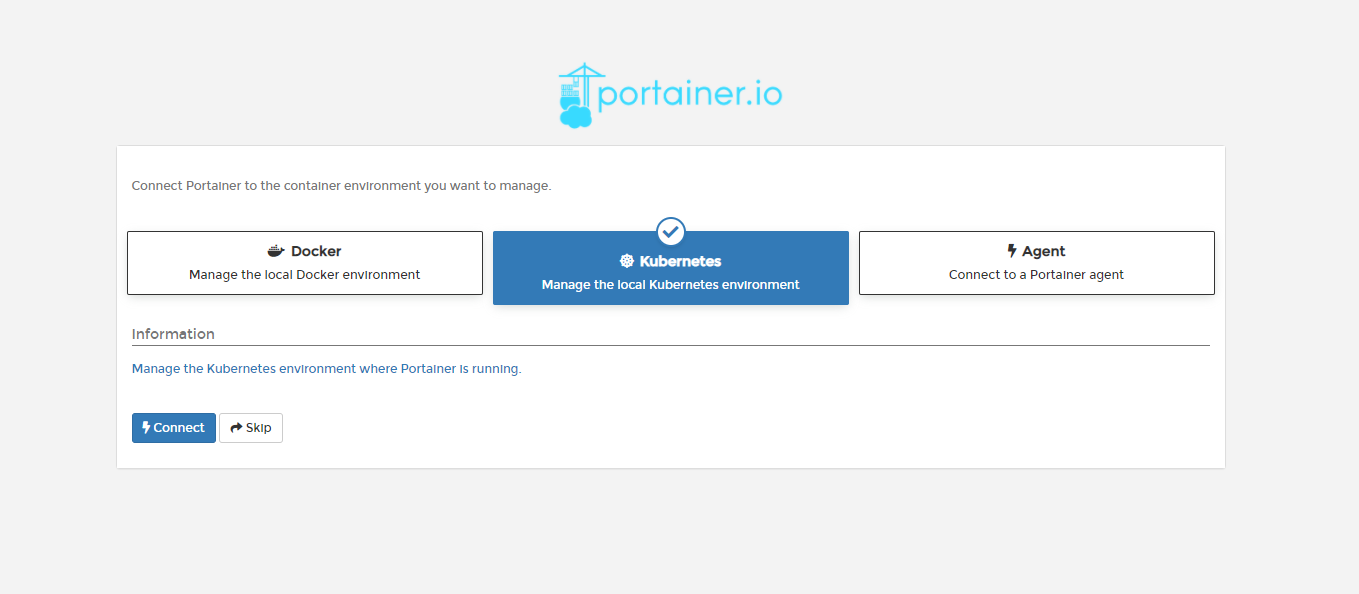
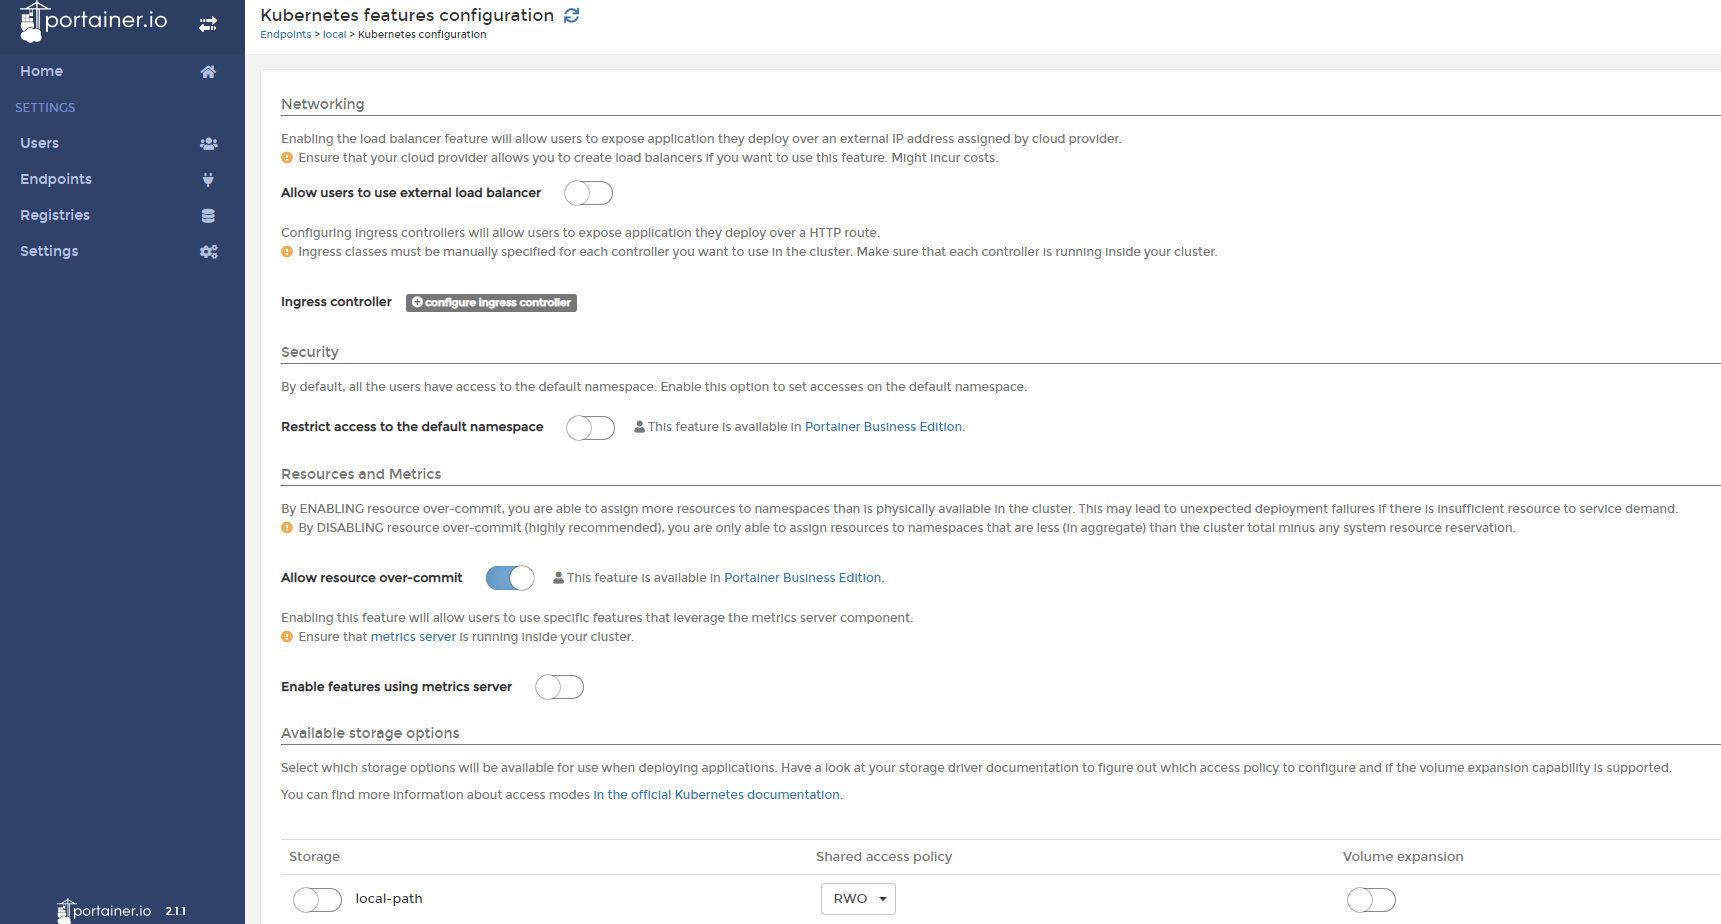
Continue with the default selection of Kubernetes. Now we're onto the configuration page of Portainer. If you want to be able to scale up your applications when demand gets high you should tick "Enable features using metrics server". This will then add more containers onto the cluster when your applications hit a certain CPU limit. This is extremely useful if you have peaks in demands for your applications. Otherwise, hit save and we'll end up on the home page.
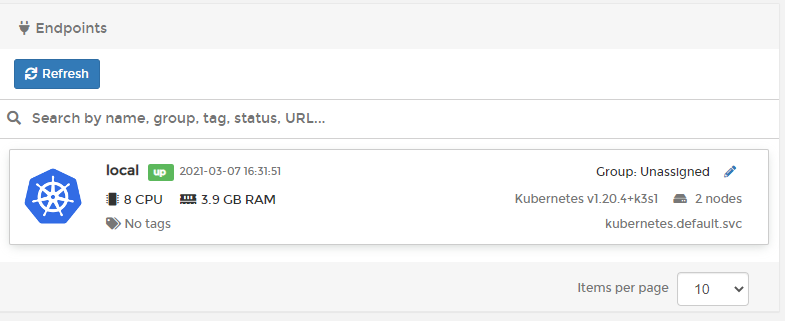
We can now see our Kubernetes cluster on the home page, with our two nodes connected. Remember you can always chuck in more nodes at a later date to get even more resources.
Running applications
Let's test our new cluster out. Click onto the cluster and then go to "Applications > + Add application". As an example application, I think we'll spin up three vs-code instances so we can see them being balanced across the cluster. Useful if you want to do some development on that 10-year-old laptop or even remotely! I'll pull this docker image. Here's the configuration I used:
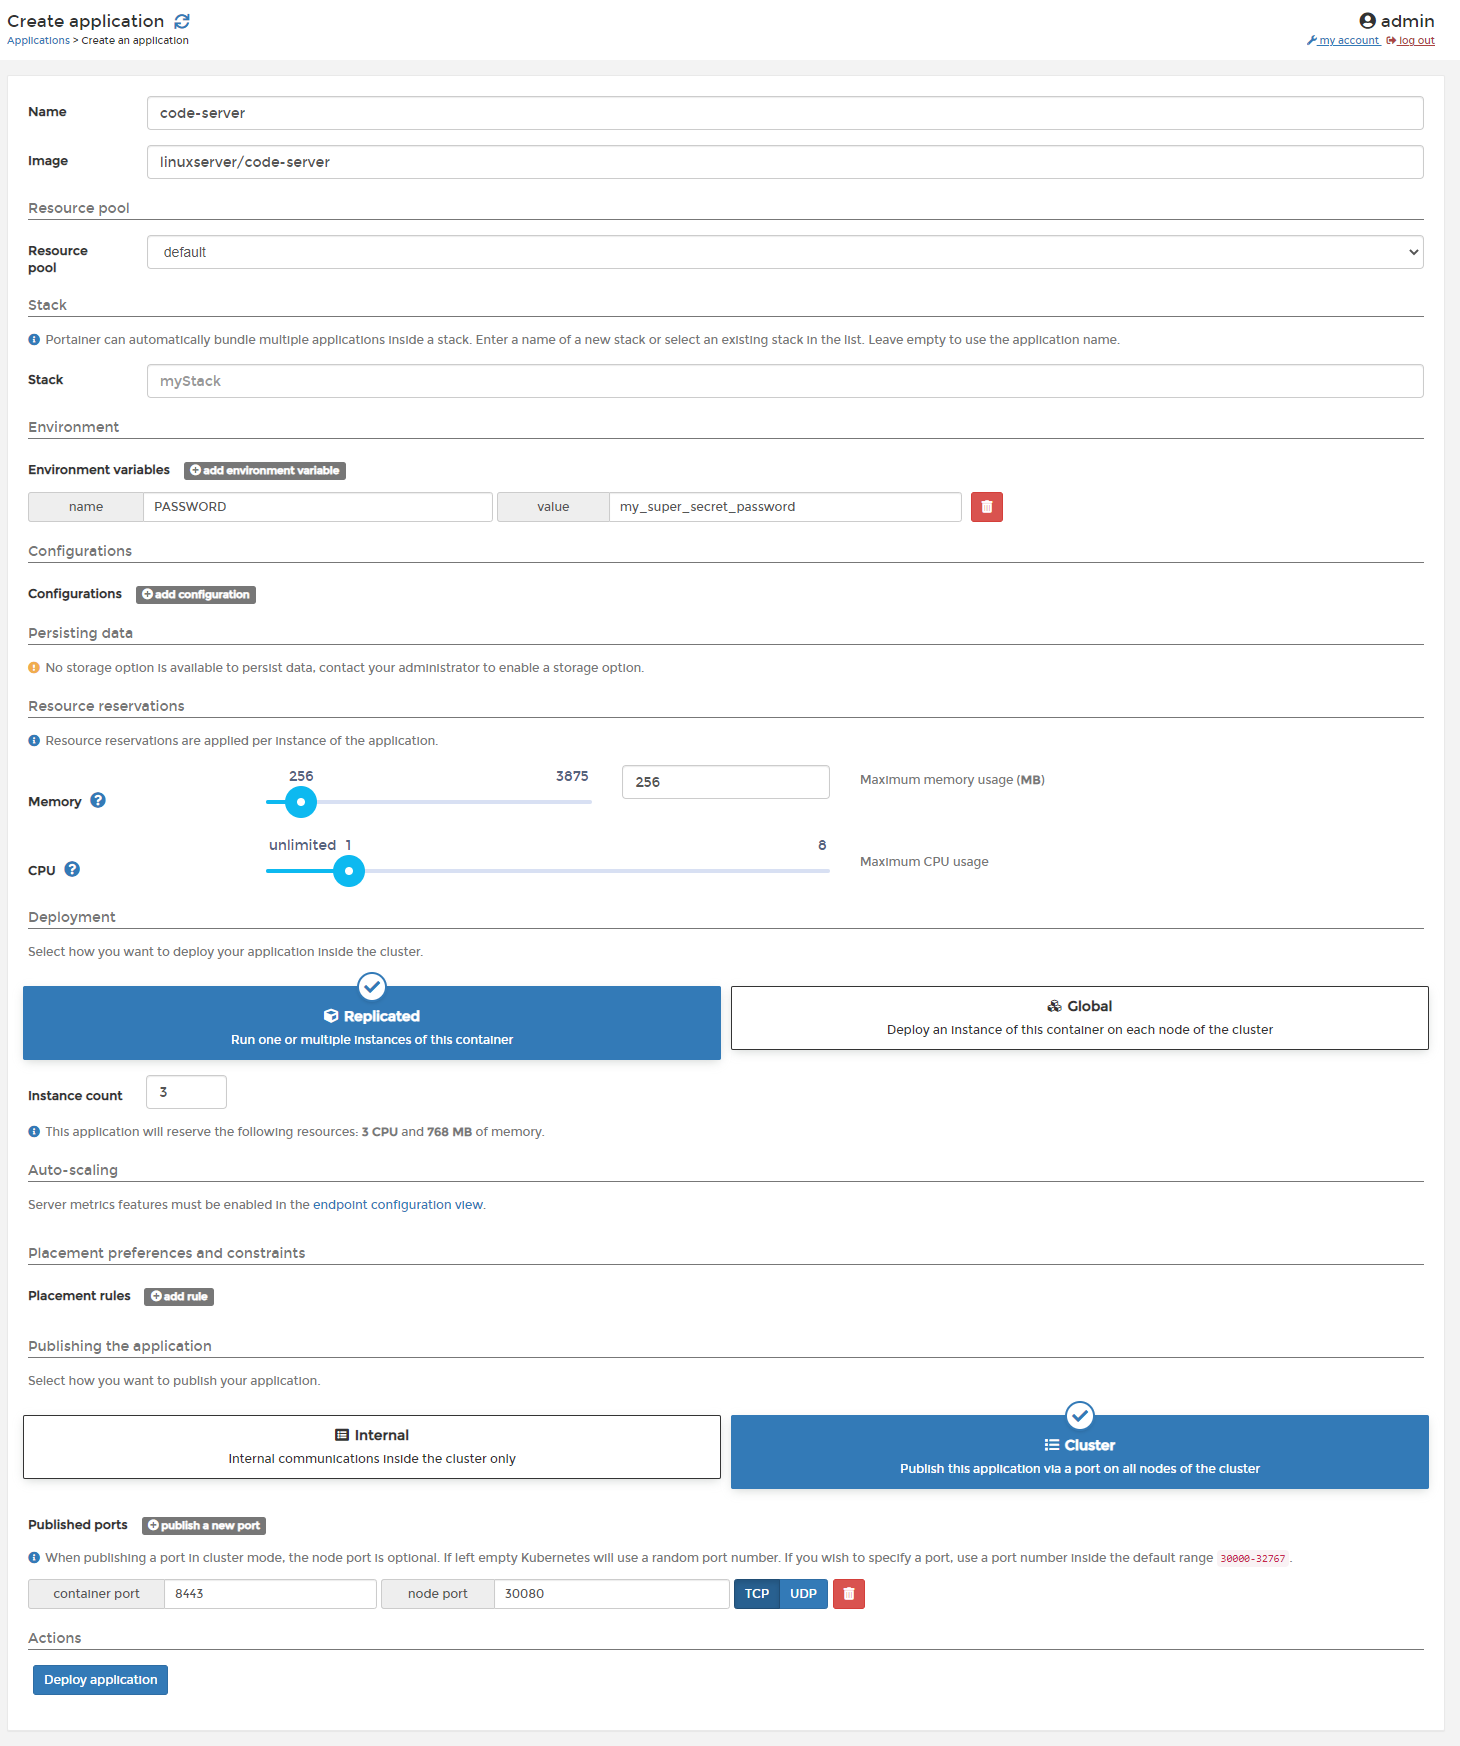
The memory & CPU constraints are very important here, this is what is going to determine how our containers are balanced across our nodes. For this reason, it's always best to be strict with your resource allocations. You can also see that we're able to set environment variables for the container with no problems through the Portainer UI, I've set the password for our vs-code instance here which will be displayed when we navigate to it.
We've also set the instance count to 3 so we should get some balance. We could use the "Global" option here to achieve this as well. We're using the "Cluster" port option here to ensure that the application instances are accessible from outside of the cluster itself and available to the LAN. In this instance, we're going to bind port 8443 to our external 30080 port.
If you ticked "Enable features using metrics server" you should also see an option in Auto-Scaling. You'll be able to set the minimum amount of containers to run at low usage and a maximum. A good example of implementing that with this vs-code container would be in a scenario where you have an office full of developers who all navigate to that shared vs-code instance. Overnight it's likely that no-one will be using it so you could have it scale down to two containers and then you could scale up to ten instances when demand peaks at 9 am. I don't know why anyone would have a set up like that but it would do the trick here.
We should see that all three pod's are scheduled in a "Waiting" status. Once these have a "Running" status let's navigate to http://pi-two:30080 and log in:
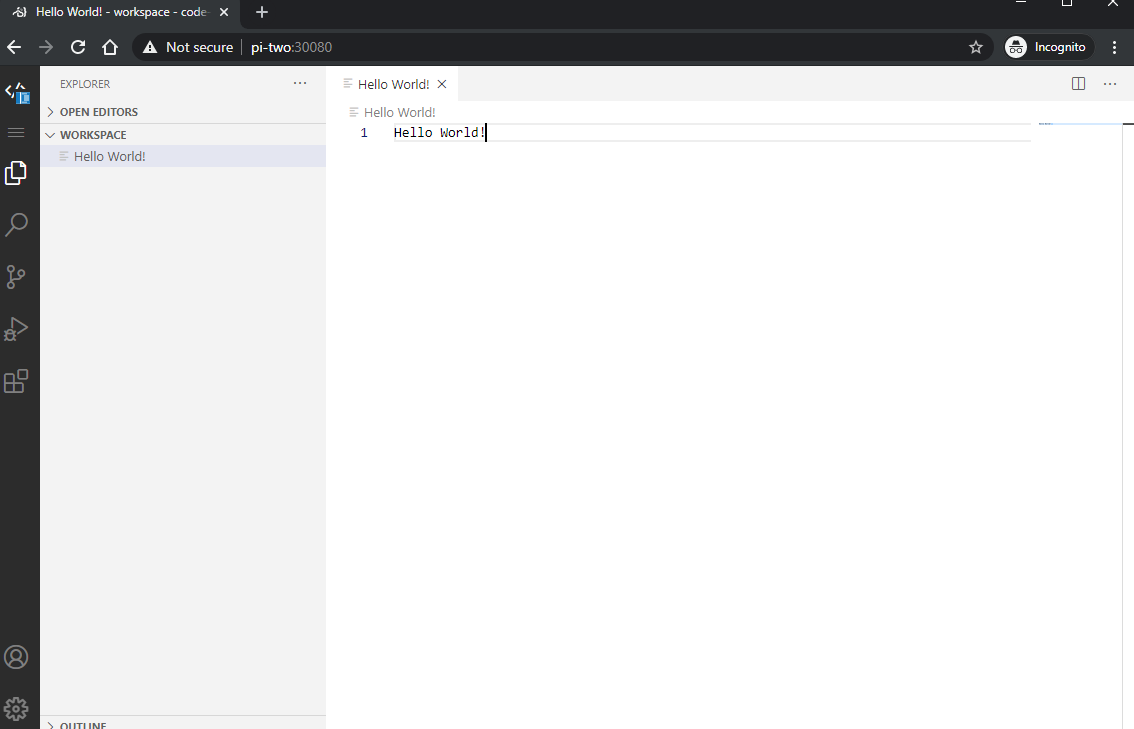
Nice! our service is running nicely. If we navigate to our other node on http://pi-one:30080 we'll see the same thing. When jumping across nodes data won't be persisted as we would need to set up a central volume for the containers to share.
We're beginning to see how powerful K3s is, especially when combined with an easy to use GUI like Portainer. So far we're able to run multiple instances of an application balanced across multiple nodes:

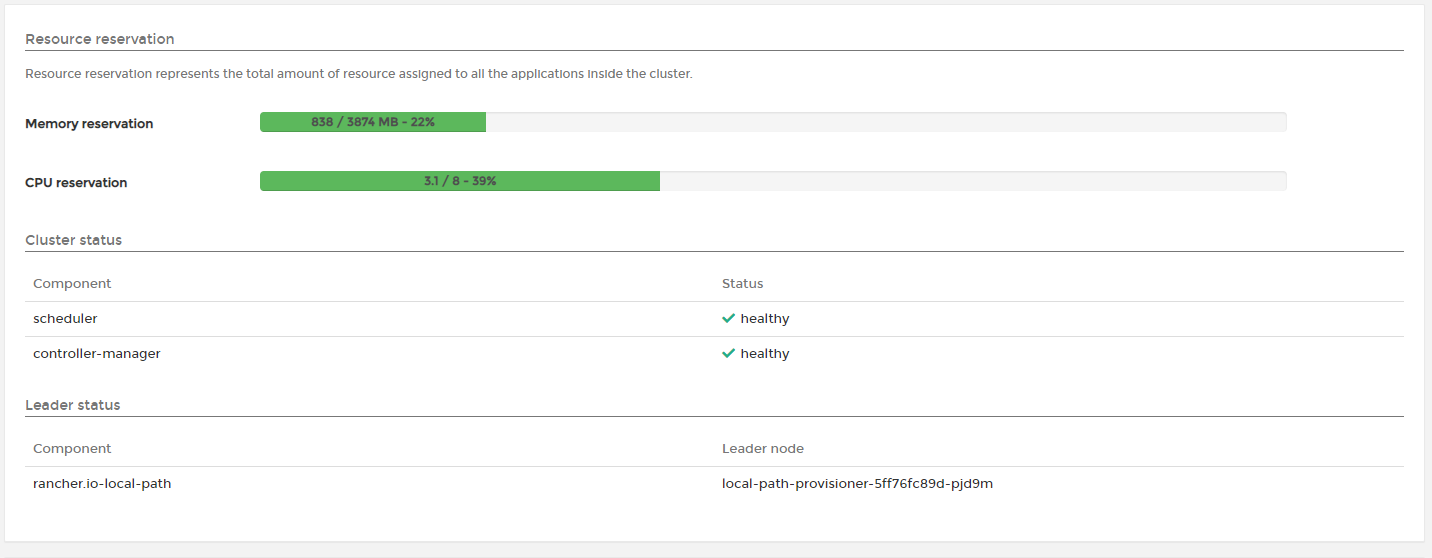
We've got lots of spare resources available on the cluster so feel free to deploy some different applications to the cluster and experiment!
The journey doesn't end here
We're now able to run any containers we want on our Kubernetes pi cluster (provided they support the arm64 architecture). Ideally, we'd like to set this cluster up to be highly available, meaning that if any node dies, our other nodes will pick up the slack until the problem is resolved. To do that we'd need to set up an external datastore. If you have three Pi's set up on your cluster you may already be able to set up high availability. I'd also like to get a load-balancer set up so that we can just hit one subdomain on a URL without specifying a port and it will route us to the correct application and node.
In a future post I plan to cover off:
- Setting up high availability
- Load-balancing
- Shared container volumes
So watch this space and thanks for reading! If you liked this post or it helped you in any way please consider subscribing to our weekly newsletter. It has all our latest posts and it really helps us out, as always there won't be any spam. Ever.