Self hosting Stringer, the anti-social RSS reader
What is Stringer?
If you're like me, I just want to consume my RSS. I don't want to see any adverts, any fancy recommendations or have a subscription fee.
I also want an RSS reader that is pleasant to use. I have dabbled with TinyTinyRSS and FreshRSS.
But for me, the UI isn't that great. I keep coming back to Stringer, and I think it deserves some more love.
Setting up Stringer
I'm going to talk through how to set up Stringer on either bare metal or Docker. You can choose your own adventure by selecting one of the links below!
You'll need to either purchase something like a Raspberry Pi with Ubuntu Server installed or use an existing server at your disposal.
I use a Proxmox instance running on a server in my loft.
You could also use something like Digital Ocean to run your Docker server, Using the following link will give you $100 worth of credits for 60 days to play around with, just sign up using this link.
Setting up Stringer in Docker
Step 1: Updating your server to the latest version
All of the following instructions are based on the Debian distro, so if you're running a server with Ubuntu, these instructions will be perfect for you. If not, you may have to adjust the commands below to suit your distro.
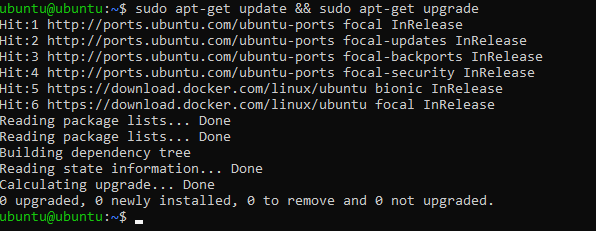
The first step is to just make sure our server is up to date. Run the following commands to pull down the latest updates from our distro repositories.
sudo apt-get update && sudo apt-get upgradeYou should see an output like the following
Step 2: Installing Docker on your server
We need to install Docker. To install Docker on your instance, you need to run the following command.
The following script is a convenience script provided by the Docker team. It's highly recommended to always check what you're going to execute, before executing it.
curl -fsSL https://get.docker.com -o get-docker.sh
sudo sh get-docker.shOnce you have executed the Docker install script. You should see an output like the following.

As you can see in the output, the command was executed successfully. You may also notice that there is a console message specifying how to use Docker as a non-root user.
This means that whenever you are executing the Docker command, you'll no longer need to type in your sudo password.
If this sounds good to you, you can simply run the provided command, substituting your-user for your server user. In my case, my user is ubuntu. My command would look like this.
sudo usermod -aG docker ubuntuWe also need to install Docker Compose. This can be done by running the following commands.
sudo curl -L "https://github.com/docker/compose/releases/download/1.28.5/docker-compose-$(uname -s)-$(uname -m)" -o /usr/local/bin/docker-compose
sudo chmod +x /usr/local/bin/docker-compose
Step 3: Spinning up Stringer
To get Stringer running, we just need to create a docker-compose.yml file on our server. To keep things tidy, I like to put them into a folder. I'm going to create a folder named stringer
cd
mkdir stringer
Now, just cd into the folder, you have just created.
cd stringerNow, we just need to create the docker-compose.yml file. We can do this by running the following command.
nano docker-compose.ymlOnce we're in the nano context, we can paste in the following code.
version: '2'
services:
  postgres:
    image: postgres:9.5-alpine
    restart: always
    volumes:
      - ~/stringer:/var/lib/postgresql/data
    environment:
      - POSTGRES_PASSWORD=super_secret_password
      - POSTGRES_USER=db_user
      - POSTGRES_DB=stringer
web:
image: mdswanson/stringer
depends_on:
- postgres
restart: always
ports:
- 1337:8080
environment:
- SECRET_TOKEN=YOUR_SECRET_TOKEN
- PORT=8080
- DATABASE_URL=postgres://db_user:super_secret_password@postgres:5432/stringer
This will be everything that you need to sping Stringer up, just make sure to configure YOUR_SECRET_TOKEN and POSTGRES_PASSWORD to something that isn’t the default value! Once done, you can exit the docker-compose.yml file.
We can start up Stringer. To do this, just execute the following command.
docker-compose up -dAfter a few seconds, you can navigate to http://localhost:1337 and you should see something that looks like the following!
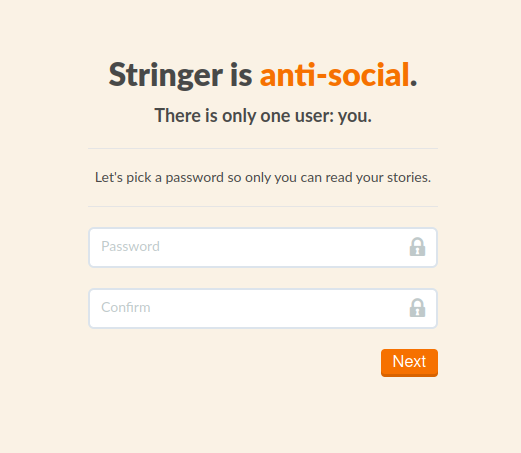
That’s it for the Docker install, just create your password and you can get to importing your RSS feeds!
Want to read your RSS outside of your home network? Jump to Exposing Stringer for web access
Setting up Stringer on Bare Metal
Tutorial copied from the official VPS installation
Step 1: Installing dependencies
This tutorial will be focusing on a Debian based machine.
sudo apt-get install git libxml2-dev libxslt-dev libcurl4-openssl-dev libpq-dev build-essential postgresql libreadline-devStep 2: Setting up your Postgres database
We need to create a Postgres user, which will own your Postgres database. Stringer uses the Postgres database to store your RSS feeds.
To create your Postgres user, execute the command below
sudo -u postgres createuser -D -A -P stringerThen we need to create the database itself, with our user attached
sudo -u postgres createdb -O stringer stringer_liveStep 3: Create a Stringer user for your machine
This will run stringer as it’s own user for security, also will install a specific version of ruby to stringer user’s home directory.
This saves us worrying whether the version of ruby and some dependencies provided by your distro are compatible with Stringer.
sudo useradd stringer -m -s /bin/bash
sudo su -l stringer
Step 4: Install Ruby on your Stringer user
cd
git clone git://github.com/sstephenson/rbenv.git .rbenv
echo ’export PATH="$HOME/.rbenv/bin:$PATH"’ >> $HOME/.bash_profile
echo ’eval “$(rbenv init -)”’ >> $HOME/.bash_profile
git clone git://github.com/sstephenson/ruby-build.git $HOME/.rbenv/plugins/ruby-build
source ~/.bash_profile
rbenv install 2.7.2
rbenv local 2.7.2
rbenv rehash
We also need to install bundler which will handle Stringer’s dependencies
gem install bundler
rbenv rehash
We will also need foreman to run Stringer
gem install foremanStep 5: Install and Configure Stringer
We need to pull down Stringer from Github
git clone https://github.com/swanson/stringer.git
cd stringer
Then we need to use bundler to grab and build Stringer’s dependencies
bundle install
rbenv rehash
Then we need to create some environment variables which Stringer will use. These will be added to the Stringer user’s .bash_profile
echo ’export DATABASE_URL=“postgres://stringer:EDIT_ME@localhost/stringer_live”’ >> $HOME/.bash_profile
echo ’export RACK_ENV=“production”’ >> $HOME/.bash_profile
echo “export SECRET_TOKEN=openssl rand -hex 20” >> $HOME/.bash_profile
source ~/.bash_profile
Then we need to tell Stringer to run in production mode.
cd $HOME/stringer
rake db:migrate RACK_ENV=production
Then we need to run Stringer
foreman startWe also want to set up a cron job to fetch the RSS feeds.
crontab -eThen paste in the following.
SHELL=/bin/bash
PATH=/home/stringer/.rbenv/bin:/bin/:/usr/bin:/usr/local/bin/:/usr/local/sbin
/10 * * * *  source $HOME/.bash_profile; cd $HOME/stringer/; bundle exec rake fetch_feeds;
Step 6: Running Stringer as a service
Running Stringer as a service means that if the machine get’s turned off, Stringer will spin back up automatically.
cd ~/stringer
mkdir systemd-services
foreman export systemd systemd-services -a stringer -u stringer
Then install the systemd services
sudo cp -a ~stringer/stringer/systemd-services/ /etc/systemd/systemThen exit the Stringer user and enable the systemd services
exit # exit racksh and app
sudo systemctl start stringer.target
sudo systemctl enable stringer.target
That’s all, you should be able to access Stringer on http://localhost:1337

Exposing Stringer for web access (Optional)
Step 1: Installing and configuring Nginx
Nginx is a reverse proxy that allows us to point a domain name to our Stringer service. By default, Stringer will be running on port 1337. In theory, you could skip this step and access Stringer using your server’s IP address and port 1337.
We’re going to use Nginx so that we can use a domain name instead.
First, we need to install Nginx.
sudo apt-get install nginxOnce installed, we need to configure a new site. This is essentially a config file that will allow routing on a certain domain name to our Stringer service.
Usually, I name my sites by their URL. To create a new site, run the following command, substituting my URL with yours.
sudo nano /etc/nginx/sites-available/rss.theselfhostingblog.comThis will open up a new window that allows us to add our Nginx configuration. Now, you’re about to paste in a lot of text, but don’t worry, I’ll walk you through what we need to change.
Paste in the following code.
upstream stringer {
server localhost:1337;
}
server {
listen 80 default_server;
server_name rss.theselfhostingblog.com; #Change Me
location / {
proxy_pass http://stringer;
proxy_set_header Host $host;
}
}
Most of this is configured for you and doesn’t need to be changed. Only the URL which Nginx wants to use. You’ll see that mine is rss.theselfhostingblog.com make sure that you change this to your URL. Also, don’t forget the ; at the end of the line. It’ll save you a lot of headaches 😉
We now need to hit Ctrl + x ,y and return to save and exit out of nano.
Now, we just need to register our new site with Nginx, you can do this by running the following command. Again substituting my domain with yours.
sudo ln -s /etc/nginx/sites-available/rss.theselfhostingblog.com /etc/nginx/sites-enabled/rss.theselfhostingblog.comWe just need to remove the default Nginx configuration to prevent a port clash.
sudo rm /etc/nginx/sites-available/default
sudo rm /etc/nginx/sites-enabled/default
Now, we can test the Nginx configuration. Run the following command.
sudo nginx -tWhich should give us a successful output.

Sweet. Let’s restart the Nginx service.
sudo systemctl restart nginxStep 2: Port-forwarding
If you’re self-hosting this on your own hardware, you will need to port forward your instance to allow public access to your instance. This will involve googling how to port forward from your router.
You’ll need to point port 80 and 443 to your instance where Nginx is set up.
If you’re hosting Stringer in Digital Ocean, you may need to configure UFW.
I have a tutorial for setting up UFW here
sudo ufw app listOutput
Available applications:
Nginx Full
Nginx HTTP
Nginx HTTPS
OpenSSH
As you can see, there are three profiles available for Nginx:
- Nginx Full: This profile opens both port 80 (normal, unencrypted web traffic) and port 443 (TLS/SSL encrypted traffic)
- Nginx HTTP: This profile opens only port 80 (normal, unencrypted web traffic)
- Nginx HTTPS: This profile opens only port 443 (TLS/SSL encrypted traffic)
It is recommended that you enable the most restrictive profile that will still allow the traffic you’ve configured. Since we will be configuring SSL for our server we will need to temporarily allow port 80 and 443 for Certbot to verify our domain endpoint.
You can enable this by typing:
sudo ufw allow ‘Nginx Full’Step 3: Configuring Certbot
Certbot allows us to generate SSL certificates for free with Let’s Encrypt. It’s simple to install and use. Even hooks in with Nginx, meaning that there’s no more manual configuration required.
To install Certbot, simply run the following commands
sudo apt-get install certbot python3-certbot-nginxThen, to set up your SSL certificate, run. Make sure that you have your domain name pointing to your IP address. This will require some DNS configuration. You’ll need an A Record.
sudo certbot –nginxFollow the instructions, select your domain name from the Nginx list.
Also, select redirect as this will upgrade any HTTP requests to HTTPS.
Once done, if you navigate to your domain, you should see the following page.

You should also notice that the SSL certificate is causing your domain to be HTTPS!
That’s all
Let me know in the comments if you get stuck along the way, I’ll do everything I can to help you out. Hope this post helped you!